How To
A few techniques..
Bagging Out (genuine technical term)
This is a great finishing technique for neatly and professionally hiding seams. Use it in any project that has a lining fabric such as bags, purses etc. I used it for the screen cosy project. It’s really easy and very satisfying.
- Make up the seams of the main fabric piece and the lining fabric separately.
- Place the right sides of the main fabric and lining together and match up the edges.
- Pin the pieces together all around. Tack if you need to.
- Starting somewhere discreet that won’t be noticed, such as the side or bottom edge, sew all around the piece with a seam allowance of about 0.5cm (or whatever you are using) but end about 7-8cm (2-3 inches in old money) short of where you started so that you have a turning gap.
- If there are any corners, clip them at a diagonal to reduce the bulkiness. Careful not to cut through the stitches.
- Now turn your item the right way round, poking (gently!) through the gap that you left. I often use the end of a pencil to assist with this.
- When the item is ‘born’ so to speak, gently prod a knitting needle or similar into the corners to sharpen them up. Also, you could ‘score’ carefully along the insides of the seams if you need to to get some good definition.
- To finish off, use tiny neat whip stitches or ladder stitches to close up the gap.
- Press carefully. Use a bit of steam to ‘set’ the seams.
Blocking Embroidery
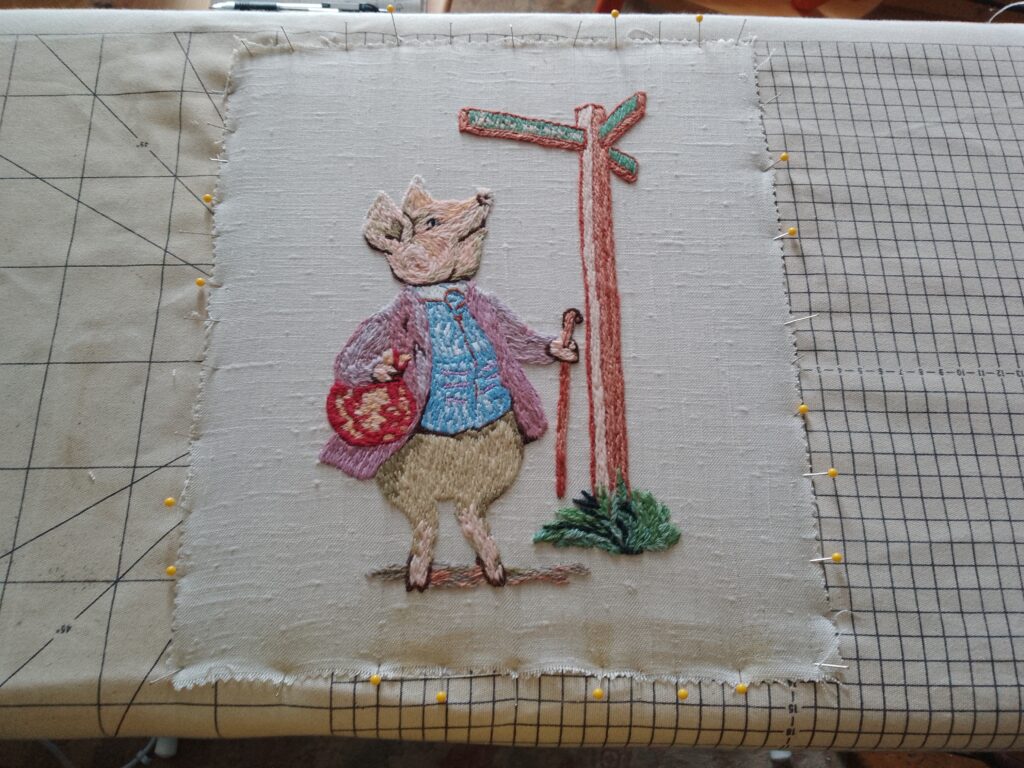
When your masterpiece is complete sit back and admire it. Take it off the embroidery frame or hoop ready to start your next project (ha!). Then sob quietly as the fabric immediately relaxes and puckers up around your beautiful stitchery. Not a good look. But all is not lost. To smooth out those ugly wrinkles and get it looking gorgeous again, you’ll need to block it.
- Start by damping the work either with a spray bottle or the iron spray function. Try not to soak the work.
- placing a pin top centre. Stretch gently and put a pin at the bottom centre.
- Repeat for the side edges, pinning in the centre, then stretching across and pinning on the opposite side.
- Then pin the corners, lining them up with the centre pins. Then repeating for the diagonally opposite corners.
- Continue working around the piece, stretching and lining up the work and pinning in place.
- When done, leave to dry.
